

A Look At The Nintendo’s Off-Screen Sprite Rendering Glitches
A Look At The Nintendo’s Off-Screen Sprite Rendering Glitches
And the inspiration I used to build Pixel Vision 8’s rendering limitations
And the inspiration I used to build Pixel Vision 8’s rendering limitations
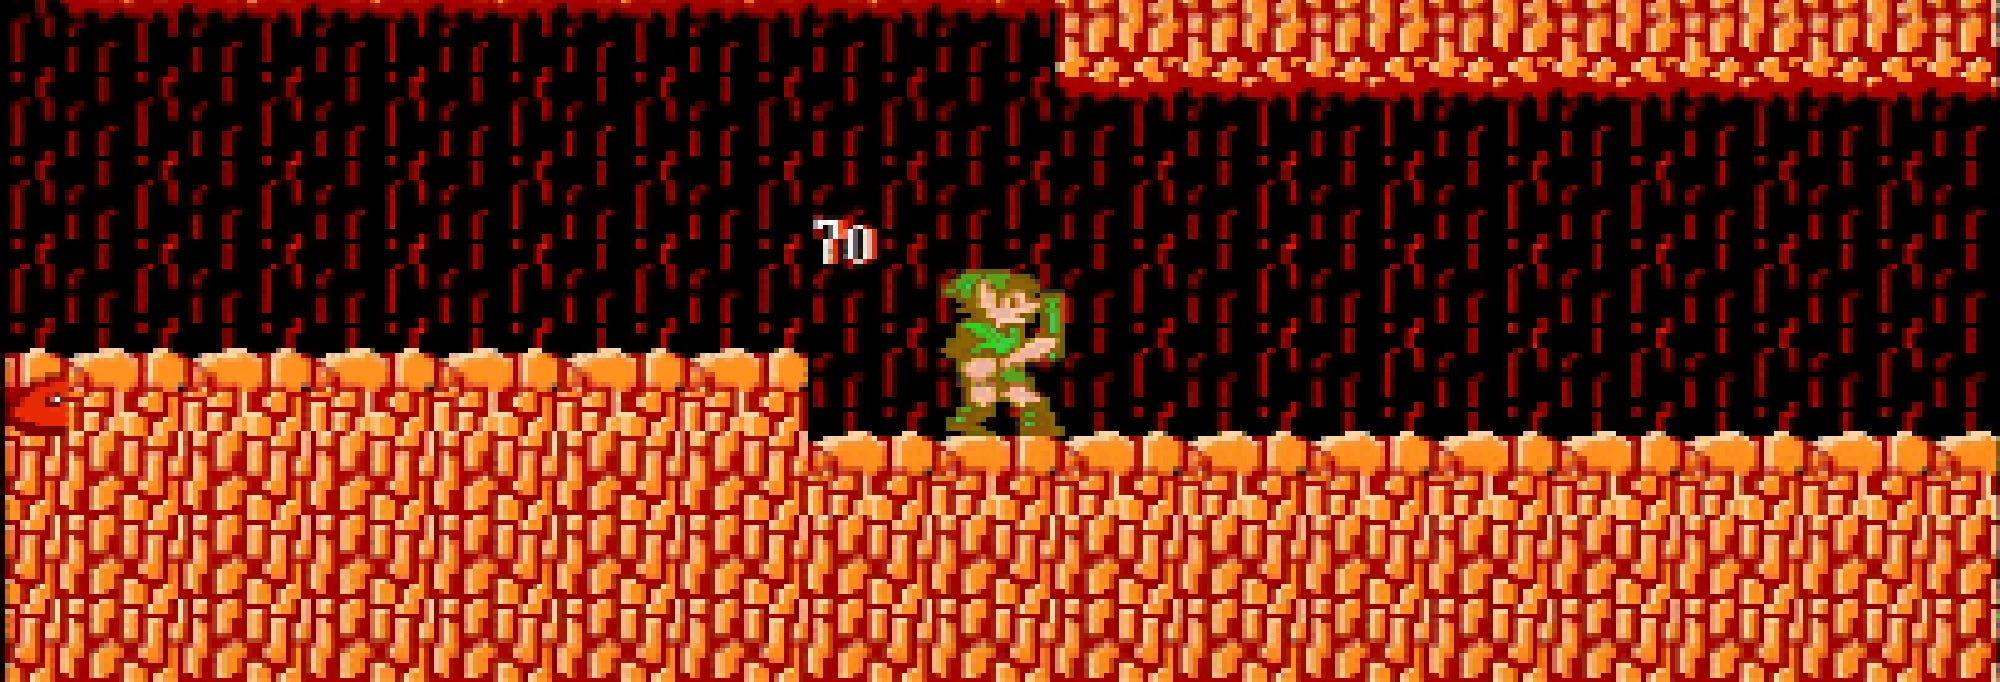
While I was capturing some game footage from Zelda II, I noticed a strange little glitch. I was in a tunnel while fighting an ax-wielding red Daira, and part of a slime flickered on the left of the screen. When I moved forward, I saw there was, in fact, a slim just off the screen.
So, why did this happen?
Nintendo’s PPU
During my research on the Nintendo PPU, picture processing unit, I learned a lot about scanline rendering in addition to what made sprites wrap around the screen. This happened when a sprite’s X position went past 255. While most players would consider this a software bug, it was a significant limitation in the NES renderer that developers had to deal with.
If you think about it, the NES is an 8-bit system. That means the X and Y position of any sprite on the screen can only go from 0–255. Today, we would use an unsigned integer to represent this. When you try to add 1 to an 8-bit value set to 255, it loops around back to 0. With the NES having a screen resolution of 256 x 240, that meant there was technically no place to hide sprites horizontally offscreen.
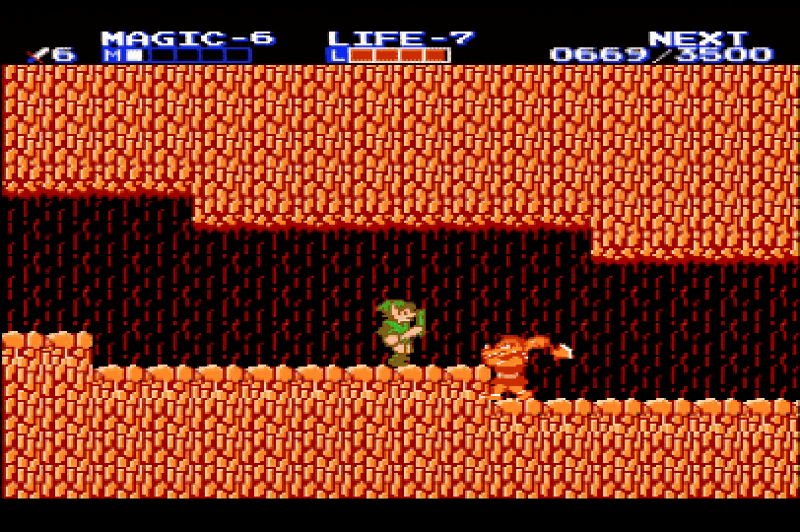
For most of the games created on the NES, this was not ideal. With nowhere to place sprites off the screen, it presented a challenge to move them into view when scrolling. To get around this, developers took advantage of the CRT’s overscan. This was a boundary along the edge of the screen where pixels were stilled rendered but technically not visible on most TVs of the time.
Rendering A Scene
Let’s take a look at an example of how this worked in a bit more detail. The NES could only display 32 columns and 30 rows of tiles on the screen at a given time.
Well, most NES developers knew that the last column of the screen was not visible on CRTs. There was a similar gutter on the bottom of the screen, but since the last visible scanline happens at 240, it wasn’t as much of an issue. The NES could skip rendering the last column and blank it out in order to create a gutter for anything offscreen.
A lot of games took advantage of this area players couldn’t see. Unfortunately, when you play older NES games in emulators or on modern TVs, you see this area, and it’s a bit jarring.
Understing Sprite Wrapping
But let’s go back to the issue I captured in Zelda II. While it’s similar to what I outlined above, there is a bit more going on here.
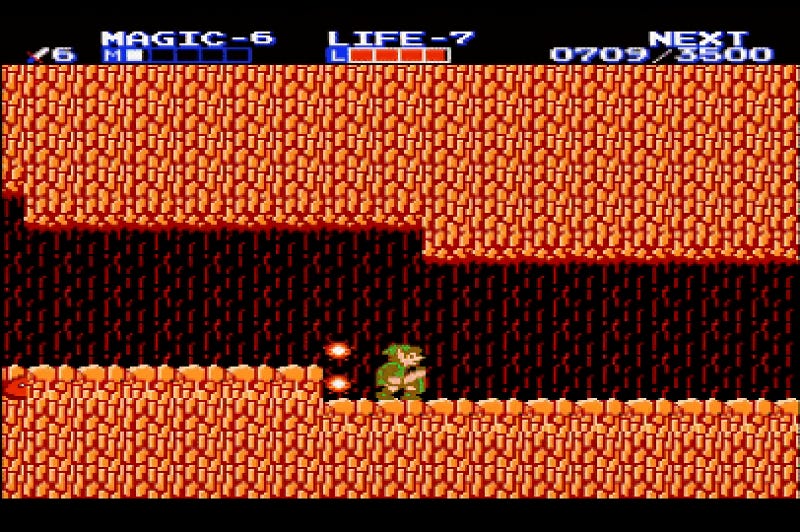
In the above still, you can see half of the slime on the left side of the screen. Technically we expect the off-screen sprite to be hidden in the overscan area. I guess that since the sprite’s movement is still being calculated, even when it’s not visible, I happened just to capture it when it was about to come onto the screen, and its X position was precisely at 256. This would turn into 0 and momentarily wrap around the screen and accidentally render on the left side of the screen.
Most of the sprites in Zelda II are 16 pixels wide, equal to 2 sprites across. This just happened to be a rare edge-case where the overscan gutter only being 8 pixels wide wasn’t enough to hide the sprite. I love these little glitches. They add to the unique characteristics that make the NES so unique. All due to some hard limitations that developers learned to work around or ignore. Today that would be considered a more serious rendering bug.
Code Example
Learning how to hide sprites in the overscan gutter is a critical technique for making more authentic looking 8-bit games. That’s why when I designed Pixel Vision 8, my Fantasy Game Console, I added support masking off the right and bottom of the screen. You can do this in the Chip Editor Tool by setting the number of columns and rows to be included in the overscan area.

If you are interested in learning a bit more about how this works in PV8, or in general, I wrote a little Lua code example to help visuals the overscan.
When you run this code in PV8, it will output the following:

If you are new to game development or looking to make a more authentic looking 8-bit game, try to emulate some of their more interesting quarks from these systems. The NES had so many based on the hardware limitations that they helped define the look and feel of the console and still inspire game developers today.